

How To Paint A Room Professionally
How to Pigment a Room
Read on as we walk you through all the steps, from choosing the paint to cleaning upwards when you're done.
![]() Time
Time
A full day
![]() Complexity
Complexity
Beginner
![]() Cost
Cost
$50-75
Introduction
If there'southward a painting projection in your near future, follow this footstep-by-pace on what you'll need and how to plan and execute it.
Tools Required
Materials Required
- 1 gallon of paint
- Ceiling paint
- Masking paper
- Pigment samples
- Paint stir sticks
- Painter's tape
- Stain-blocking primer
- Trim pigment
- TSP or other heavy-duty wall cleaner
- two 6-in. 3/8-in.-nap roller sleeves
- Wall spackling compound
Project stride-past-step (9)
Step 1
Choose a Colour
- The first question to ask yourself fifty-fifty before you pick up a paintbrush is: How exercise I choose a pigment color?
- Head to your home center or paint store and have them mix three or four color samples for you.
- Test your colour samples on different parts of the room to become a feel for the pigment colors. Keep in mind different lighting in the room will change the color drastically.
Choose a Paint Finish
- Gloss finish is the most light-reflective of whatsoever paint option and is hands washable. Great for forest trim, cabinets and doors.
- Semi-gloss finish is somewhat reflective, durable and helpful in areas that need to be cleaned regularly. Great for kitchens, bathrooms, closet doors, trim and utility areas.
- Satin finish has simply a fiddling shine and then it's easily cleaned. Also dandy for loftier-traffic areas like kids' bedrooms, kitchens, living rooms, entryways and hallways.
- Matte and flat finishes absorb the low-cal instead of reflecting it, then they work well on walls with imperfections. Great for bedrooms and any uneven walls, or walls with texture.

Footstep two
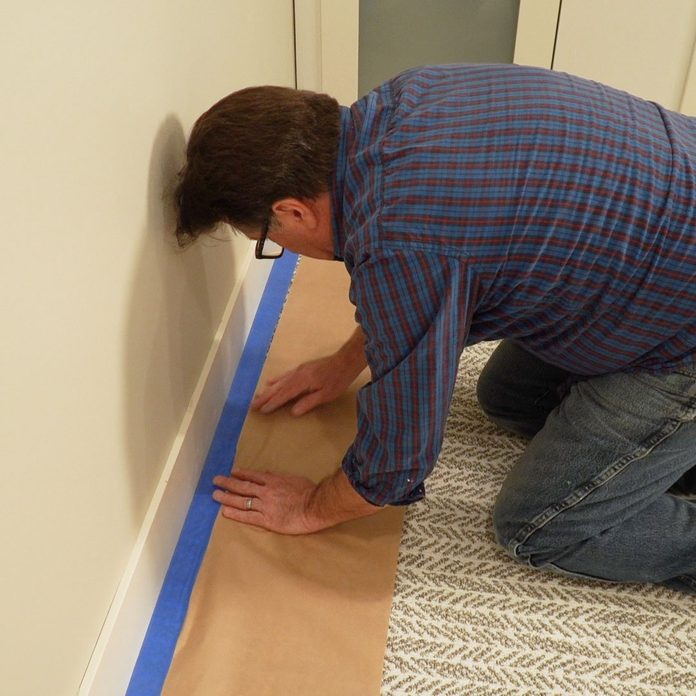
Protect Your Floors and Furniture
- Tape down masking newspaper or rosin paper to the floor and carpet forth the baseboards to protect them from paint splatters and spills.
- Spread a drop cloth on the floor and over whatsoever piece of furniture in the room you're painting. Fabric drop cloths work meliorate for this — they're less glace than plastic drop cloths.
![]()
Footstep three
Prep the Walls and Trim
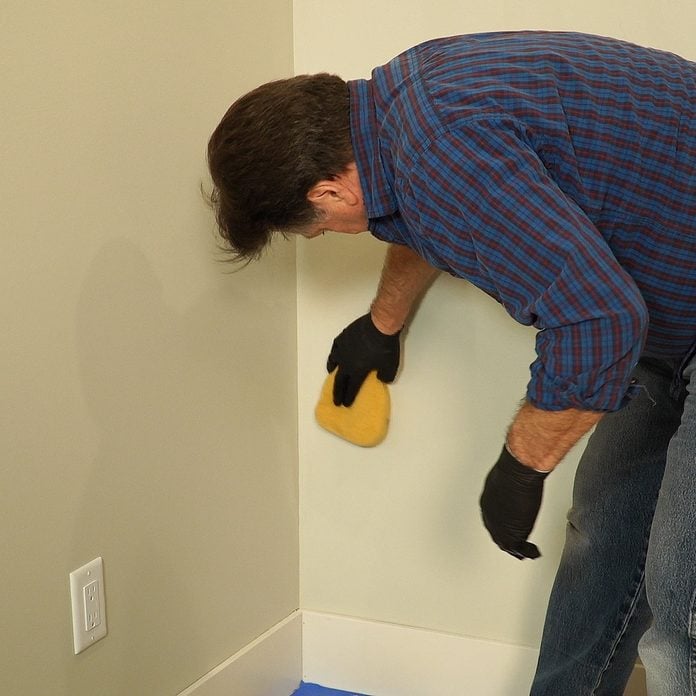
- Before painting and patching, it's a good idea to wash all the walls and trim with a heavy-duty cleaner such equally TSP. Removing clay and grease will permit the pigment stick better.
- Shine a utility light at the wall to become a closer wait at the defects on the surface.
- Knock down any blast pops and bumps you lot find on the walls. Make full the holes and cracks with spackle or patching compound. Sand all patches polish with sandpaper.
- Always use a coat of primer over the patched areas earlier painting.
- Remove outlets and switch plates.
Footstep iv
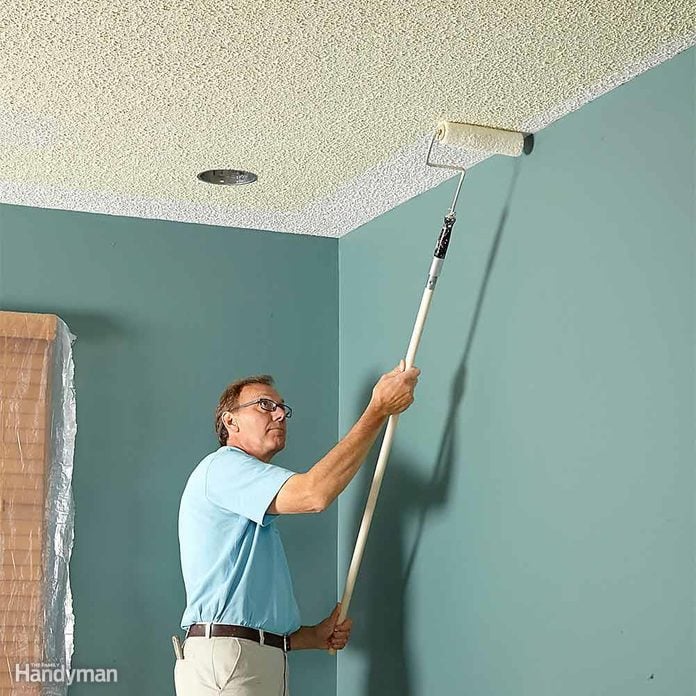
Paint the Ceiling
- Painting the ceiling at this point will avoid paint splatters on your walls and trim.
- Pour virtually three cups of ceiling pigment into a small container you tin can hold in ane paw. Paint the edge of the ceiling along the perimeter of the whole room, using a 2-1/2-in. angled paintbrush. (This is called "cutting in.")
- Use a iii/8-in. nap roller to paint the ceiling from ane finish of the room to the other. Roll the paint on in the aforementioned direction, one roller width at a fourth dimension, overlapping the previous row. If a 2d coat is needed, ringlet the paint in the opposite direction yous painted the start glaze.
Step 5
Paint the Trim
- In most cases, pigment the trim beginning before the walls. Permit the paint dry, then record off the trim and proceed to pigment the walls. If the top edge of your trim isn't wide enough to hold painter'south tape, paint the walls first, permit the pigment dry, then tape off the walls and go on to paint the trim.
- A few things to think about earlier painting the trim. Are you painting just the trim or are you painting the windows and doors as well? Painting a door is much easier if you remove information technology first.
- Utilise high-quality semigloss acrylic enamel pigment with a 2-1/ii-in. angled paintbrush. Take your time, practise a nice job and don't be in a hurry.

Step 6
Tape Forth the Edges
- Apply painter's tape (not masking tape) forth the edges of the trim earlier painting the walls. Taping the perimeter of the ceiling will avoid brush and roller marks, resulting in a nice make clean line between the walls and ceiling.
- Visit Family Handyman for more information almost How to Choose and Use Painter's Tape.

Footstep 7
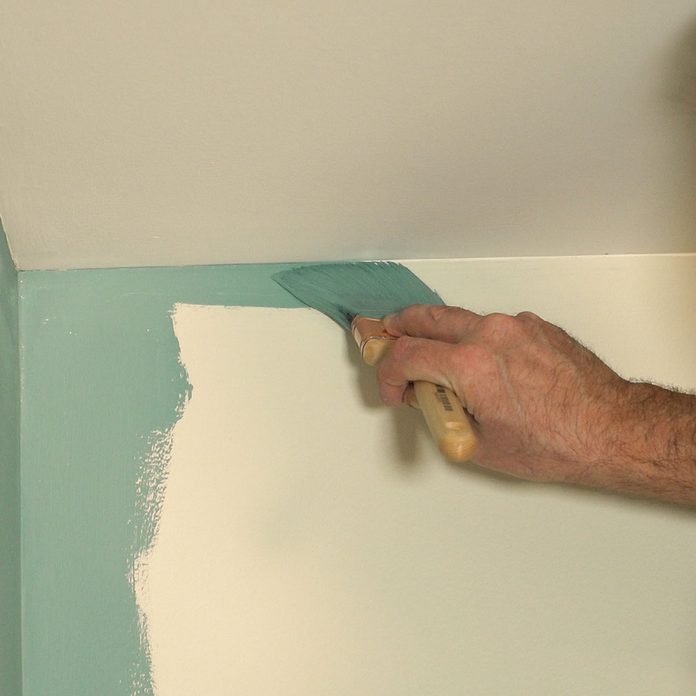
Cut in the Walls
- It'southward a adept practise to cut in i wall at a time, then immediately roll out the wall while the cut-in paint is still wet. The cut-in paint will blend much better with the wall paint.
- As was mentioned in Step 4, pour about three cups of paint into a small container you tin concord in ane hand. Paint forth the edges of trim and baseboards too every bit effectually the perimeter of the ceiling, using a ii-1/2-in. angled paintbrush.
- Pro tip: Wrap your brush in plastic wrap or put it in a freezer handbag to keep it from drying out between cutting-in coats.
Step eight
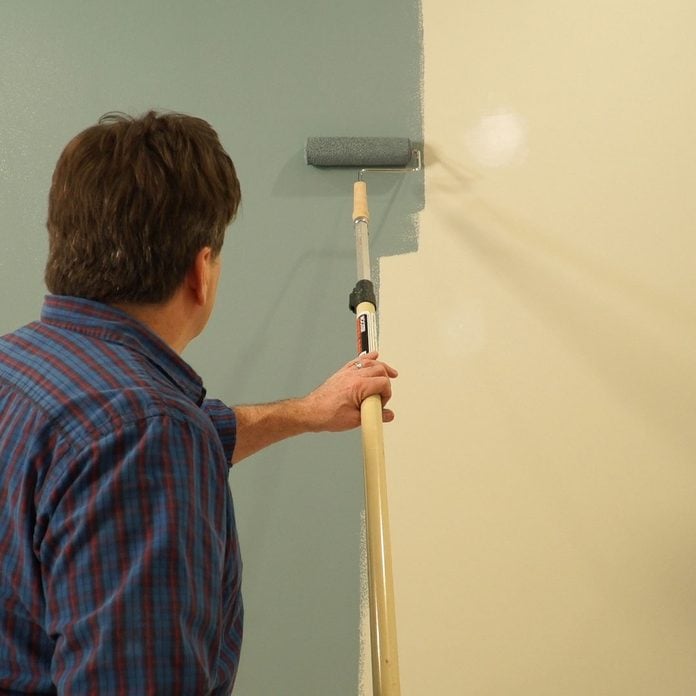
Roll Paint the Walls
- Be sure to stir the paint with a pigment stick before yous kickoff.
- Fill the roller tray a piffling over half-full with paint — too much paint in the tray may spill over.
- Load the roller with paint from the paint tray and roll paint on the wall from the baseboard to the ceiling. Gyre straight dorsum down without reloading the roller to ensure the wall is covered.
- Again, load the roller with pigment and offset a new row overlapping the previous i. Paint the full height of the wall. The edges of the roller tend to exit pigment build-up lines. Ringlet back over the lines and blend them in with the rest of the pigment.
Stride 9
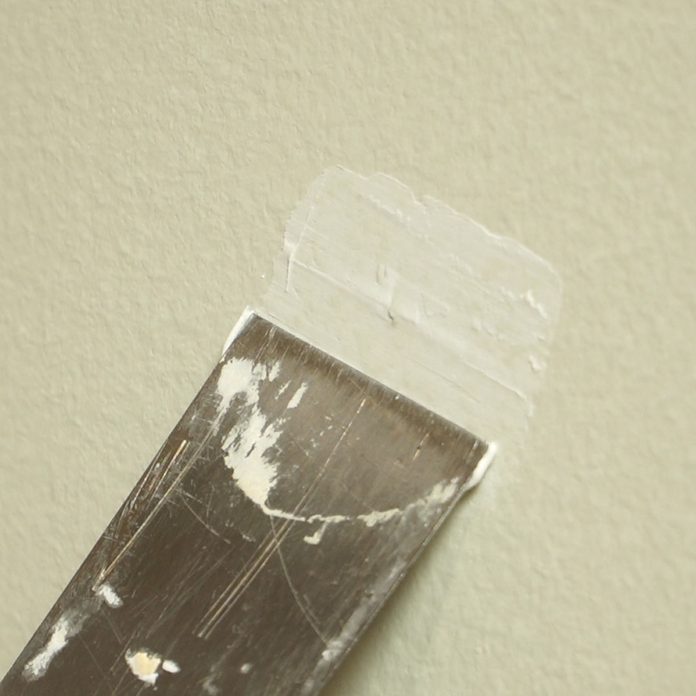
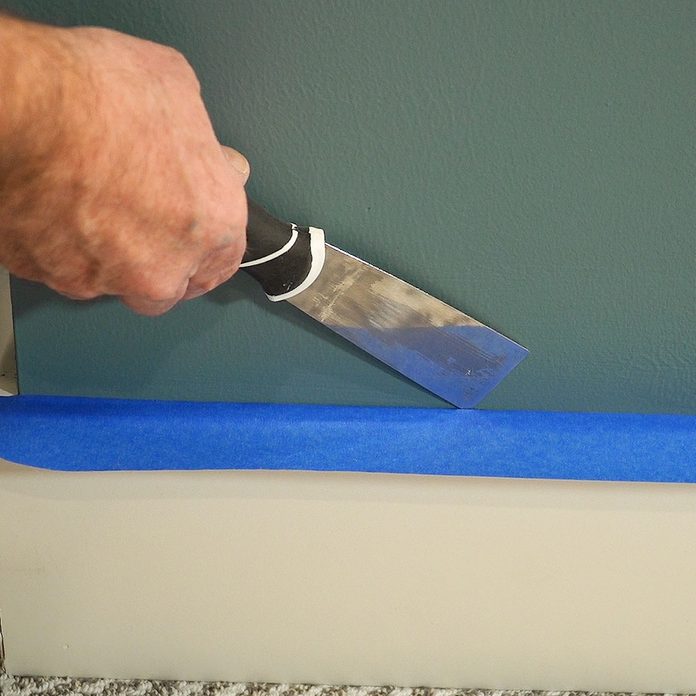
Skin Tape and Clean Up
- Earlier peeling the record from the trim and baseboards, score along the edge of the record where it meets the wall using a flexible putty knife. (Come across photo.)
- E'er thoroughly clean your brushes and rollers with hot soapy water.

Source: https://www.familyhandyman.com/project/how-to-paint-a-room/
Posted by: pearsonthimemper1969.blogspot.com
0 Response to "How To Paint A Room Professionally"
Post a Comment